Projects

This is where I will talk about my various projects. This includes home improvement, woodworking, tayloredtruth.com, robotics, and more.

Wednesday, July 04, 2007

Headboard Progress

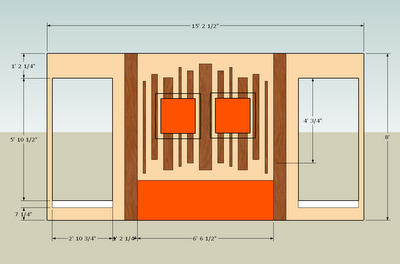
I haven't made any progress on the headboard in close to a month. The combination of rain and other activities has really slowed me down. I hoped to work on it today but I'm not sure I will because of the rain again. It's not that I can't work in the rain, but it isn't particularly pleasant. Anyway, I thought I'd put out a brief update on what I've got so far. I updated the design slightly to avoid the baseboards and to allow us to add crown molding later if we want. I also made my plans more detailed as you can see in the picture.
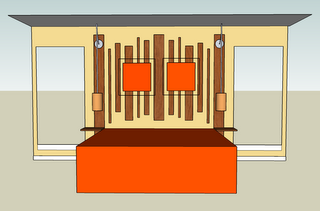
headboard sketch

The previous picture didn't even show the tables which I have completed building. They are 14 inch squares made from four pieces of oak. Just for these little pieces, I used a planer, miter saw, jointer, biscuit joiner, and sander. They turned out looking great; I just have to figure out how to attach them now.
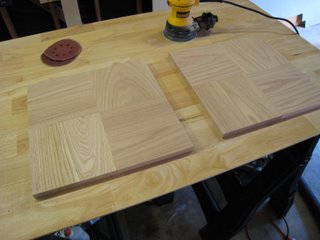
bedside tables

And last but not least, I've already put up most of the boards. Compared to the two that are left, these were fairly easy but it did take some time to get them up there straight and evenly spaced. I used keyholes in the backs of the boards placed so that I just needed to get two level rows of screws in the wall with the correct spacing. It took some time and diligence but worked perfectly.
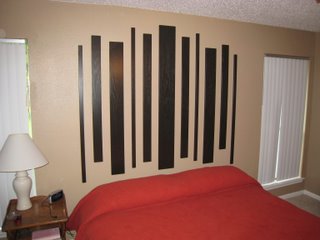
most of headboard

Labels: , , ,

Sunday, June 17, 2007

Little Projects

I haven't done a real projects update in a couple of months. The main reason is that I haven't made a lot of progress on anything big and with all the rain we've been having it really feels like I haven't done anything. However, when I think about it, there are many one day projects I've done that are still fairly significant. So this post is going to be a quick catchup and then I'm going to try to be better about posting even the little things as they happen. In addition to the things below, I've done some work on the headboard but I'm going to save that post for another day because E just got home from work .

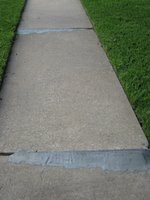
repaired sidewalk

Sidewalk - I mentioned some work I needed to do on the sidewalks in front. I got some quick setting concrete designed for patching that came in its own little bucket so all I had to do was add some water. It was actually pretty easy and despite the bicycle marks turned out pretty well I think.

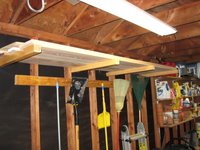
Garage - Another rainy day project was organizing the garage. Since I started woodworking, I've been amassing more and more tools and wood so every now and then I have to take a step back and reorganize. This time, I mainly focused on wood storage. I reorganized my small scraps into various nooks like between studs and I used the legs from an old table to make a rack for long boards. I just moved the existing bolts from the leg corners to the sides and ran them through the studs.

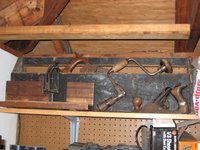
wood rackold tools

I also took the opportunity to find a display shelf for some old tools I got from my grandfather. They were his dad's or maybe even his grandfather's. I just wanted to put them out because they are pretty cool. The picture shows the display with an old toolbox, miter jig, hand drill, and hand plane.

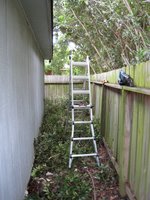
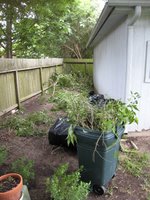
Yard Work - A couple weekends ago, we had a dry day that I spent cleaning up the trees around the house. Our oak tree got its yearly trim and I spent a significant amount of time cleaning out the trees that overhang our fence behind the garage from my neighbors' yard. I mainly did this because it just looked bad but there were also some limbs toughing the roof of the garage and there were vines that had taken over and were not only growing in the trees but also the roots are invading my yard. I'm hoping that pulling up some of the roots and providing more sunlight will help the grass grow back there. The pictures below give you a taste of how much I cut out. It was not my favorite task and I actually took a couple more days cutting it up to take down to the street.

tree trash1tree trash2

Labels: ,

Sunday, April 01, 2007

More Garage Lighting and Upcoming Projects

E and I have decided that our next big project will be the "headboard" for our bed. I put that in quotes because it isn't exactly a headboard but I can't think of a better description either. It's actually more like wall art over and around the bed. Confused yet? The picture below is a rough sketchup of the design.

Bedroom headboard design

There are actually a few details missing. There will be small tables on each side of the bed cantilevered out from the boards there and some pendant lights that hang down above the tables. Again, hard to explain but we hope to have it done soon so I should be able to put up some pictures. I've already got the middle boards ready to be stained. I cut keyholes in them for hidden mounting to the wall.

The reference to more garage lighting is that I installed two more lights in the garage like the others. I wired them to the existing switch so I can get some pretty good light in there. The motivation was that we are in a pretty rainy season but there wasn't enough light to stain wood with the garage door closed. There is plenty of light now!

The other "upcoming project" I'm actually just about to go do. Because of tree roots, there are some steps in our sidewalk and the community association has been complaining. There is a whole frustrating story there because the steps in our sidewalk are nothing like some of the others around the neighborhood. We figure that someone on the board must live on our street. Anyway, I bought some concrete and I'm going to try to build "ramps" like the association requested. We'll see how it goes.

Labels: , , , ,

Sunday, February 18, 2007

Computer Desk: Part VI - Finally!

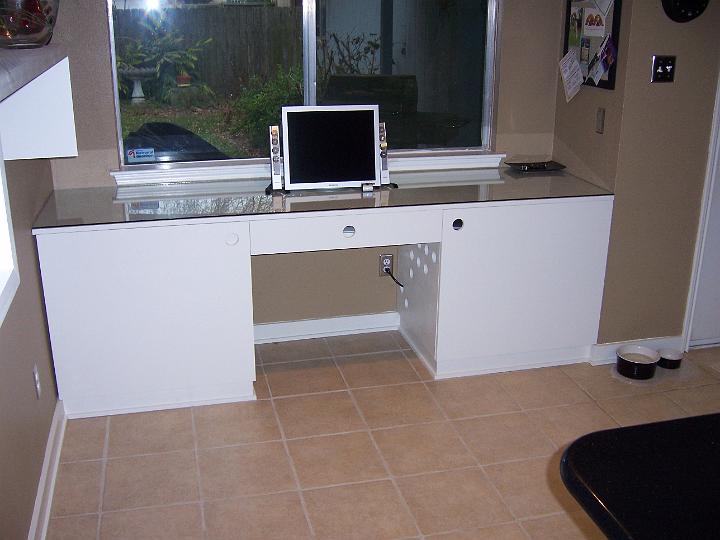
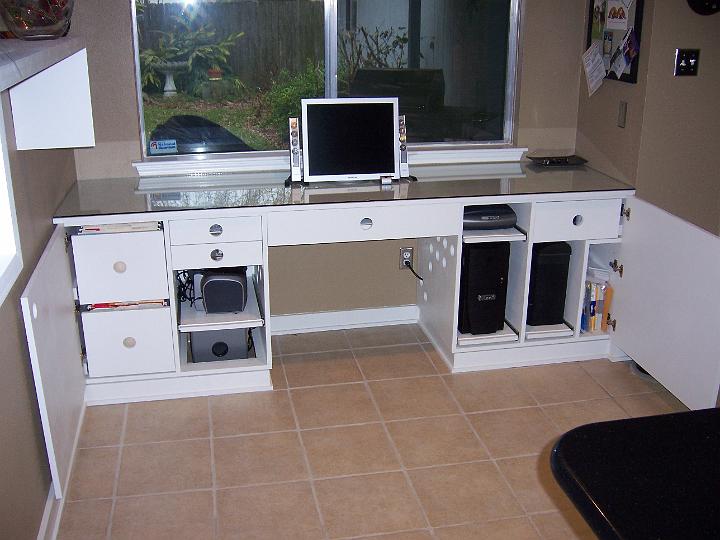
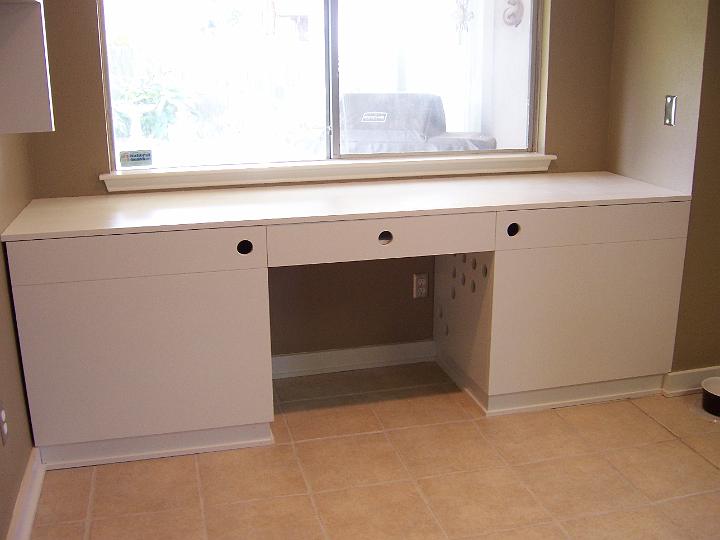
The computer desk is done! Actually, it has been for a couple weeks but they have been a very hectic couple of weeks for E and I. I went to Washington, DC last week for work and E joined me for the weekend. We've also been really busy at work. Anyway, that's why it has taken a while to get this entry published. We've completely moved into the desk now including computer, accessories and files. There's not really much to say about it except that we decided to go with glass for the durability. See the pictures below. Notice that all of the components can pull out. This is great for access but made cord running a real pain.

desk w/doors closeddesk w/doors open

Labels: , , ,

Thursday, January 11, 2007

Computer Desk: Part V - Finished?

desk with top

Well...not quite but it is starting to look like it. The top, doors, keyboard drawer, and baseboard have all been installed since the last time I posted a picture. The top hasn't actually been secured yet because we are going to take it and have glass or acrylic cut to fit to protect the top. I'm leaning toward acrylic because it will be easier to work with, can be really thin, and is cheap but it will depend on what the edge finishes look like. We are also going to be cutting at least one hole in the top for monitor cables. We have discussed cutting several holes to make it a design feature. The baseboard needs to be touched up where the nail holes are and I've still got a few more drawers to do but it is coming along.

Labels: , , ,

Tuesday, January 09, 2007

Computer Desk: Part IV - The Teaser

I worked on the desk a lot last weekend and E did some painting. We got the doors finished and the top is currently being painted. Sorry, I'm too lazy to go take pictures right now but I just wanted to let you know that progress is being made. I expect it to look finished by the end of the coming weekend. It still won't have some of the innards though.

Labels: , , ,

Thursday, December 28, 2006

Computer Desk: Part III - Drawers

desk drawers

Elizabeth and I worked on the desk yesterday and will do a little more today. She started painting some of the sliding shelves that the components will sit on and the center section that will house the keyboard drawer. Once these are done and the center section is installed, I can work on the doors and then the top so it finally seems like I'm getting somewhere.

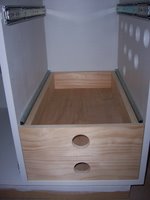
In the mean time, I built a couple of the drawers. I'm really happy with how they turned out. You can see how they look in the picture though they will actually go at the top instead of the bottom of the cabinet.

Labels: , , ,

Thursday, November 30, 2006

Computer Desk: Part II - 'Oops!'

Progress has been slow on the desk lately and I recently made it harder on myself. First, E has of course done her job of painting the bases and they look great. I've started working on the drawers, shelves, and the center section that will hide the keyboard behind a fake drawer. It took me a long time to decide how I wanted to do everything. I finally, built the center section though and E painted it and then I dropped it. Oops! Okay, I'll admit that the first word out of my mouth was not quite as polite as 'oops.' Anyway, I pretty much have to start over and am having difficulty finding the motivation to do work I've already done but at least the planning is done, right?

Labels: , , ,

Sunday, October 01, 2006

Computer Desk: Part I

So, I've mentioned this desk that I am building for the breakfast nook in the kitchen several times and I am finally going to fill in some details on the project. Since we moved in, we've had a table and chairs set in the breakfast nook, and it has been nice to have as an extra place to sit and eat. However, when we remodeled the kitchen and put in the new countertops, we added seating at the island so we can sit there and eat. This was partly because we wanted to get rid of the table and put a desk there instead. It is a nice spot for a desk because of the window plus moving the computer and accessories out of the third bedroom will free up that room for other purposes.

Since we are trying to store a lot of stuff in the desk, I am using the entire 95" width of the nook and I am going to make it a built-in. Actually, it will not be attached to the walls or anything so it could come out, but I am going to match the base molding and do a few other things to make it look like part of the house. We will probably leave it when we move and I want it to look good so that it adds value to the house.

desk in work

Anyway, here you see where I am at this point. Obviously, neither piece is actually finished because they need to be painted and I need to add the doors but you can get the idea. Each compartment has its purpose and it was all designed around the things we want to put in the desk (computer, printer, scanner, shredder, files, subwoofer, etc.). As always, there are a couple more pics in the house album.

This is all made from 3/4" MDF held together with glue and a few screws. I used the joinery shown in this picture (created in Google Sketchup). Both of these joints add structural stability and increase glue surface area. I got all the hardware including the drawer slides shown from Rockler.

The next step is to add the top. This should be pretty interesting because the walls are not square and aren't all that straight either so I'm going to try to make a piece fit. Then I have to build all of the drawers and the center piece which will be a faux drawer hiding a slide out keyboard. Stay tuned and I'll do my best to keep this up-to-date with my progress. Unfortunately, I probably won't work on it much for about 3 weeks so I doubt there will be any updates until then.

Labels: , , ,

Sunday, September 17, 2006

Kitchen Shelves

S wall shelves

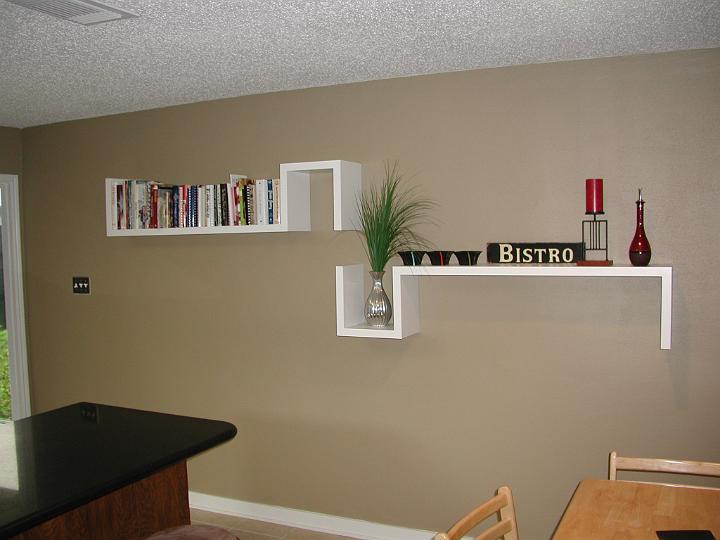
What do you do with a really long blank wall in a kitchen? How about wall shelves. But not just any wall shelves...fancy, large, funky, creative, 'S' shaped wall shelves. Though not a completely original design, these shelves are yet another brilliantly functional and attractive design from my lovely wife.

As far as design, I think the pictures say all there is to say and, in fact, there is not that much to say about the implementation either. The shelves are made from glued up 3/4" MDF to produce a thickness of 1 1/2". The total length is 5ft and stud positioning was taken into account during design to guarantee plenty of support for the relative heft of that much MDF. These shelves are very secure due to the mounting method I chose. Basically, I created a copy of the shelves out of solid 1x2 wood and fastened the copy to the studs with screws. The shelf pieces were dadoed to fit over the 1x2 copy and a couple of screws through the top of the shelf attach them together.

This is all part of a master plan that will include some more decorative work on the wall and a wine rack. I'll be working on that after I finish the desk. Speaking of the desk, for the first time I will try to keep the blog up-to-date with progress instead of just giving updates upon completion so look forward to that.

Labels: , ,

Sunday, September 03, 2006

Kitchen Makeover: Part III

complete cooking area

It is easy to forget exactly how much work we have done in the kitchen until I start trying to document it all. We left off with the countertops having just been put in. After that, we had professional tile layers come in and put up the backsplash. We, also, added knobs and handles to the cabinetry and painted the walls in a tan color. With these changes, the cooking area of the kitchen was mostly complete.

Next, attention was focused on the long wall with the wayne's coat. We pulled the wayne's coat off but it had been attached with liquid nails so it tore up the drywall. After about a week of E and I both trying to fix the dry wall and match the existing texture, we finally gave up and had painters come in. They were smarter and smoothed the whole wall and then retextured instead of trying to match the existing texture.

baseboard

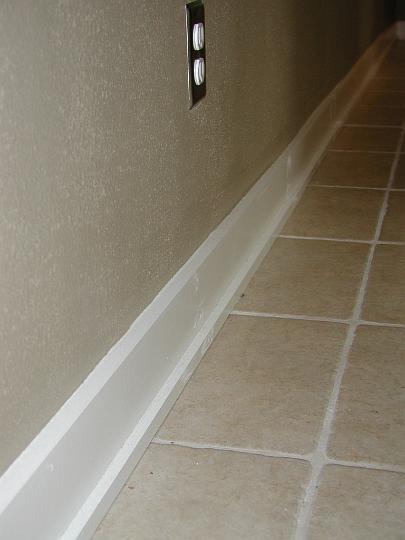
Lastly, we put in new baseboard. Because the tile had been installed after the wayne's coat, the baseboard had to be pretty thick to cover the gap. As you can see, we just used a very simple design. We also, put it under the cabinets and just the small piece of baseboard around the back side of the island. Putting it under the cabinets meant it needed to go in front of the dishwasher base. This is a problem because the dishwasher sticks out a little and because I didn't want to have to remove the baseboard to get to the dishwasher. I solved this by attaching a piece of baseboard to the dishwasher with magnets. It stands out a little , but is hardly noticeable in person.

That pretty much wraps up the major changes to the kitchen itself. There are a lot more pictures in the house album. I've since added some shelves to the long wall that I'll write about next and I am currently building a desk to go in the breakfast nook. There will be plenty of time to write about that because there is still much left to do.

Labels: , , , ,

Friday, August 18, 2006

Reindeer

Sorry it's been so long since I posted. I'm sure there are hundreds of people that have been disappointed when they checked in every day. ;-) Anyway, the next project that E had me do was some reindeer for Christmas decorations.

reindeer

One of her coworkers has some like these and she stole the idea from her. These were pretty simple to make. I just used the jig saw to cut out the patterns and then sanded and we painted them. The only trick is that the fronts are covered in glitter as well as paint. If I remember right, we used spray paint until they were sufficiently covered and then rolled on one coat and while it was wet, sprinkled on the glitter.

By the way, I have finally started working on my next project. It is a built-in desk for the nook in the kitchen. I'll be posting the work E and I did in the kitchen pretty soon so you'll be able to see the nook then.

Labels: ,

Wednesday, August 09, 2006

Finished Coffee Table

The coffee table assembly was not particularly difficult. I just cut the wood down to size and rounded the corners slightly. I then used a drill press to drill the appropriate holes. Of course, hole placement is very important so I used a jig to help with that.

I bought the 1/4" polished aluminum from a metal place on I-45 but I had to buy a 12 foot piece and cut it down. I used a hack saw which was a nice workout. Of course, I then assembled the piece and stained it but I couldn't get the stain off of the aluminum so I had to cut four more pieces to replace the ruined ones. Oh well, lesson learned and the finished product looks great.

ottomanottoman

Labels: , ,

Sunday, July 30, 2006

Coffee Table Design

Once we had the ottomans built, we had to decide on a table design. E and I had talked about several but I had a real hard time picturing the one she liked most so I looked for drawing programs that would help. I stumbled on POV-Ray, a ray tracing program with which people can make some amazing images. I figured if people could make such incredibly realistic images, that I could pull off something representative of our table designs. Here are a couple of designs:

table design in POV-Raytable design in POV-Ray
Ottoman in POV-Ray

I don't remember but I think those may have been my designs which is why they are not as good as the final product. ;-) Of course, how could I possibly visualize the finished product without a simulated ottoman? Okay, at this point your thinking I have way too much time on my hands, which is not entirely untrue, but really it is not nearly as hard as it may look. I think I only spent a week or so working on POV-Ray, which is not bad considering I had never heard of it when I started.

Anyway, the final design is shown below with and without the ottomans. It was very helpful to have the 3D model of the table because not only did it help me see what E was talking about but it helped us tweak the design. Yes, believe it or not, it wasn't perfect from the start. For instance, I added the center piece so that it wouldn't just fall over. Also, we used the program to help us decide how thick the wood and aluminum rods should be. I'll talk about the construction and show you the finished project soon.

table design in POV-Raytable design in POV-Ray

Labels: , ,

Saturday, July 29, 2006

Ottomans

After a little distraction, it's time to get back to documenting my woodworking and home improvement projects. The one I'm going to start talking about today is the coffee table and ottomans that I built. Elizabeth had gotten this idea to build a glass-top coffee table with room for four ottomans to add more sitting room in our living room. She picked out the fabric she wanted to use early on but we hadn't settled on a table design. Since the ottomans were pretty much figured out and because I wanted to have them built before starting the table (for final dimensions), I went ahead and built the ottomans.

ottomanottoman

The boxes are made of 1x2 stock with 1/4" plywood sides and a 3/8" plywood top. I put this all together with brad nails, a hammer, and a nail set to countersink the nails. This wasn't too bad for the first box but after four, I really wished I had bought a nail gun. The legs are made from four pieces of 2x2 oak that I planed and glued to make a 3" leg. I then mitered angles and cut them to length to match our sofa legs (though smaller of course). These are fastened to the bottom with screws.

ottoman

Once the boxes were done, E took over. She cut and glued the padding, sewed and stapled the covers, and covered and attached the buttons. These were a lot of work but I think the results were worth it. I'll talk about the table design and show the results later.

Labels: , , ,

Thursday, July 06, 2006

Need a nap? Make a bed.

Well, this seems like an appropriate time to write about the bed that I built. I am supporting the STS-121 Shuttle flight by providing engineering and analysis support for my company's Laser Camera System which is being used for on-orbit inspection of the Space Shuttle. Unfortunately, my shift is from 2:30 am to 11:30 am, so I am pretty tired right now and could use a nice bed to lay down in...

This project was my first real woodworking project as well as part of my motivation to pick up the hobby. E and I knew we would need a new bed when we moved into the house and we had found some beds we liked but they were all extremely expensive dispite being quite simple in design...so I said "I can make that" and a hobby was born. The bed is a pretty simple platform made from pine stock with stained oak on the finished surfaces. The pictures below show the platform and what it looks like with the bed made (it seems this picture was taken before the last board was attached so ignore the little gap).

picture of platform bed framepicture of (almost) complete platform bed
T-slot used to hide bed bolts
The basic form is pretty simple with 2x6 pine creating a frame including a middle beam for support and 1x4 pine used for the slats. The slats are held in place by slots routed in the ends of the boards and dowels embedded in the side pieces (there are some detail photos in the projects photo album). The thing that makes the project interesting is that I wanted to be able to take it apart but I didn't want exposed screws or bolts so I created T-slots (see right). By using these slots and embedding the nut in the footboard, I was able to hide the fasteners but maintain the ability to dismantle the bed in the future.

Labels: , ,